Getting Started
Follow these steps to begin developing your projects with SensEdu.
Basic Setup
Step 1 : Mount SensEdu Shield onto the Arduino GIGA R1.
Step 2 : Connect Arduino to PC with a USB-C cable
Step 3 : Download and Install Arduino IDE
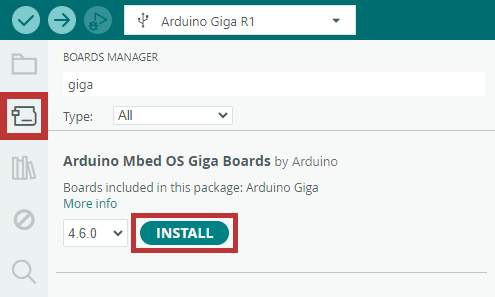
Step 4 : Open the Boards Manager tab, search for giga and install the latest version of Arduino Mbed OS Giga Boards package
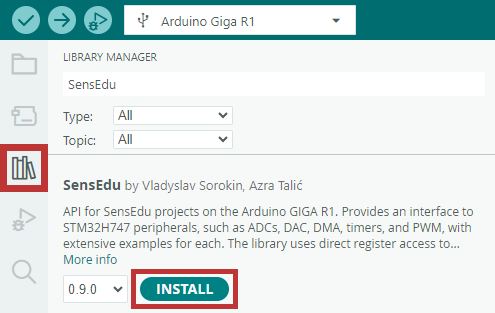
Step 5 : Open the Library Manager tab, search for SensEdu and install the latest version of the SensEdu Library
Step 6 : Navigate to File → Examples → SensEdu and select Blink_Delay example
Step 7 : Select Arduino Giga R1 board and corresponding COM port
Step 8 : Click Upload to compile and upload the sketch to your board. If the built-in LED starts blinking, the initial setup was successful! From here you can explore the rest of the examples, most of them are walked through in the Library section.


Projects Setup
After completing the basic SensEdu setup, you can explore already established projects.
Most projects pair an Arduino sketch with a host script. The walkthrough below uses MATLAB, so make sure it is installed. Some other projects also ship a Python alternative.
Step 1 : Download the latest SensEdu release

Step 2 : Unzip downloaded files to a preferred location on your system
Step 3 : Open .\projects\Ultrasonic_Ranging\complete_ultrasonic_ranging\complete_ultrasonic_ranging.ino and upload the sketch (the same way you uploaded the blinky example). This is the Pulse-Echo Ranging project
Step 4 : Open .\projects\Ultrasonic_Ranging\complete_ultrasonic_ranging\matlab\complete_data_acquisition.m
Step 5 : Update COM port of the host script according to Arduino IDE port
Step 6 : Run the host script
If the host script does not do anything, usually it is because the COM port is busy. Typically it is caused by the Serial Monitor being open in the Arduino IDE - close it.
Step 7 : Test with a flat object on top of the board, you should see the distance to the object.
Post-Setup
Now that your setup is complete, you can start developing your projects with SensEdu! Here are some next steps to get started:
- Explore the Library wiki section for detailed examples of each peripheral
- Check out other sample projects in
projects\folder, and respective Projects section - For troubleshooting or guidance, visit the Help section
If you are interested in contributing to SensEdu, visit the Contributing page and join our community!